(sorry about the image quality here~ my camera fails me~ ;3; )
I start off the process by taking the novel and writing first an outline, then a script for the chapter. The more chapters I can do at once the better, really, because then I can really get into the storytelling.
I made a thumbnail template in Photoshop at the same size as the pages in the finished book so that I can print out a bunch of these templates onto 8.5"x11" printer paper. I like having two pages per sheet so that I can get a feel of what the pages will look like once they're published. Then I draw out a chapter's worth of layouts and add the text and my editor and I discuss what changes should be made. Here's what a finished page of layouts looks like:

Then I start on the sketch. I usually sketch pretty loosely unless there's an expression I want to get just right. Sometime I'll have drawn a really good expression in the layouts, in which case I'll blow up the panel in photoshop, print it, and then trace it onto the manuscript paper with my light board.
I'll start out with inking anything that overlaps panels, and then the panels themselves. People always ask me how long it takes to ink a page. That REALLY depends on the page. Pages with detailed backgrounds or lots of people on them take forever, but on average I finish 3 pages a day, and on really good days I can finish 5. My record was 7 in a day...but they were really easy pages. lol
(I worked on this page before I figured out that making a thumbnail template was the way to go, btw)


After the inks are done I have to scan the page....which...is kinda a huge pain. My scanner only scans A4 sized pages, which is close to 8.5"x11", but the size I ink at is 9"x13"...so I have to scan each page in parts, and then stitch the parts together in Photoshop. I know there are cheap, large format scanners out there... I went through 2 of them in 6 months before I decided I wasn't going to waste any more money. Maybe I just have bad scanner luck..but...whatever.
Anyway, so with everything scanned and stitched together, I can finish things up. I scan my pages in grayscale at 9"x13" @ 600dpi, clean everything up, and then resize to 5.876"x8.5" @ 1200dpi. Then I convert my page to bitmap. With the inks completely finished at this point, toning can begin! Whee~ my least favorite part of the process~ I have several minion--- er, I mean friends on call to help me out at this part because if I had to do it all on my own, I'd probably go totally insane. :3 I usually have them flat color everything on the page that will be toned, creating selectable areas of gray that I can finish toning myself.
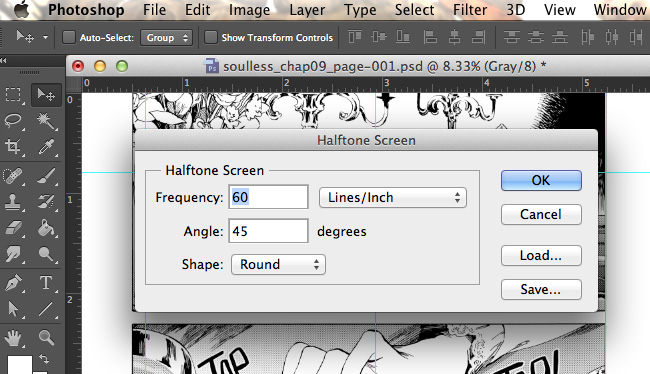
Once toning on my end is finished, if I haven't done it already in the inks, I'll add dialogue bubbles and sound effects. Then the whole page gets turned into a bitmap image via halftone, creating those dot patterns you see in black and white comics.
There you have it, the whole process. Just repeat 250 times and you have yourself a book! lol <3
1 comments:
So beautiful!!! Is there a way to add a 'post to Tumblr' icon? I'd love to reblog it to my Tumblr~
Post a Comment